🚀 Getting Started with On My Disk
Welcome to On My Disk — your private personal cloud platform. Unlike traditional cloud services, On My Disk keeps your files and data on your own devices, ensuring full control and privacy.
1. Getting Started (Onboarding)
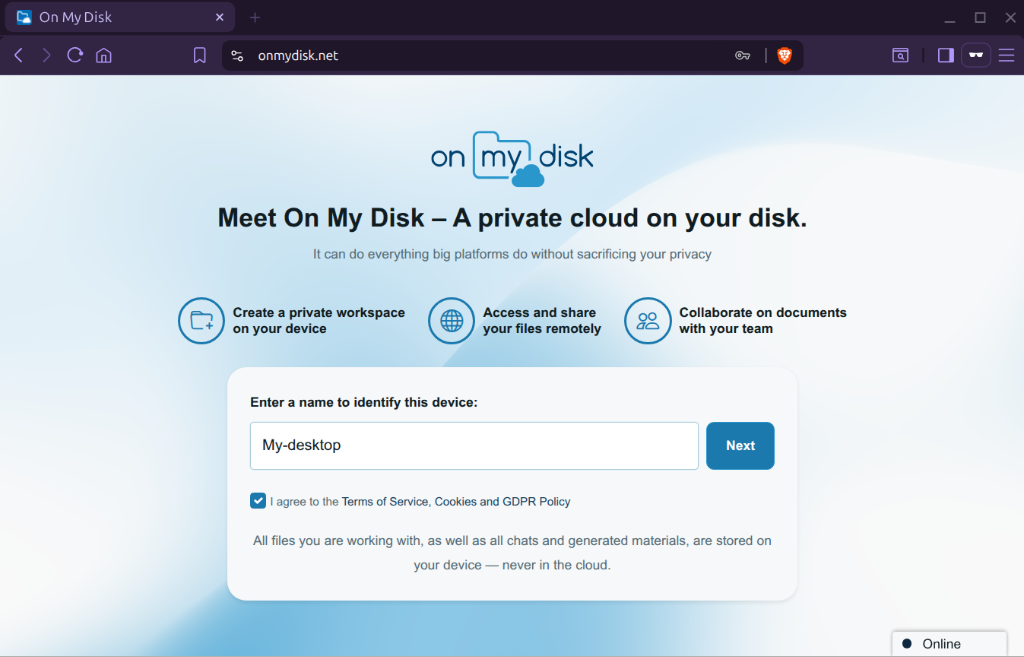
You can start using On My Disk instantly by choosing one of the two access methods.
Anonymous Login
If you are opening onmydisk.net for the first time, the system will offer a quick setup:
- Device Name: Enter a name for your current browser (e.g., “My Laptop”).
- Agreement: Accept the Terms of Service (ToS) and GDPR Privacy Policy.
- Connect a Folder: You will be prompted to select a local folder for sharing. You can skip this step and add folders later.
Anonymous accounts are linked to a single device only and do not support multi-device access. However, since On My Disk works directly with your real file system, clearing your browser cache will not result in the loss of your files.
Sign in with Google
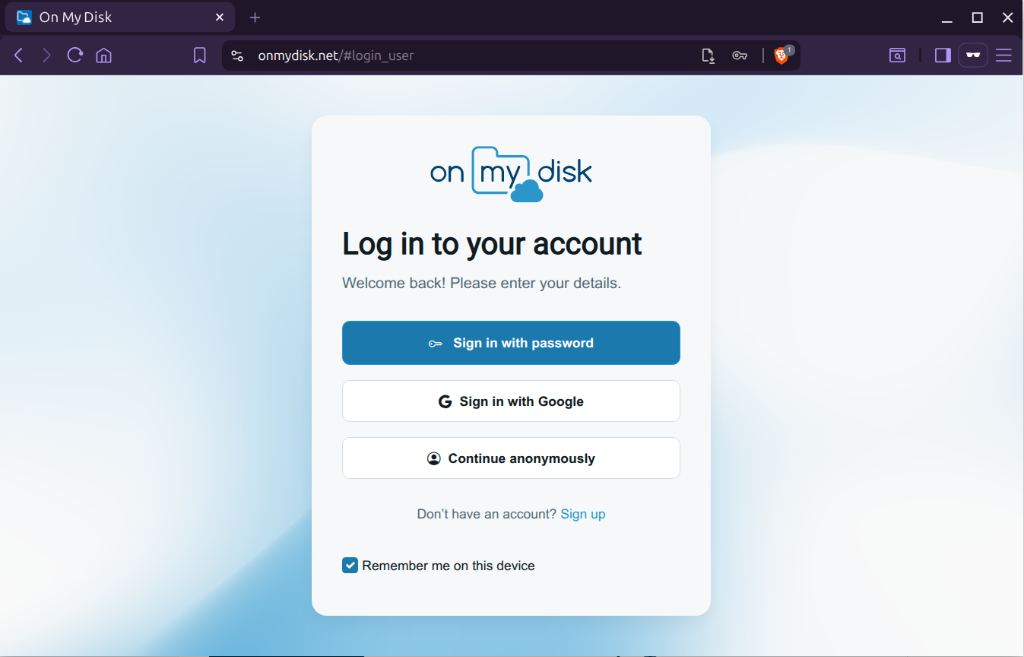
The simplest way to access multiple devices is signing with Google account from each of them:
- Click on the profile icon in the bottom left corner.
- Select Sign in with Google.
- After authorization, you will see all your devices in ‘My Devices’ section.
Create an On My Disk Account
If you prefer to use a separate account:
- Click on the profile icon and select Sign up.
- Enter your Email and create a password.
- An activation link will be sent to the specified address.
- Click the link in the email to confirm your registration.
If the email doesn’t arrive within a few minutes, be sure to check your SPAM folder. Registration confirmation emails sometimes end up there by mistake.
2. Connecting Folders
On My Disk allows you to turn any folder on your computer into part of your personal cloud.
You can add a folder in several ways:
- During Onboarding: The system will prompt you to select a folder during the first run.
- In the Device root folder: Navigate to your device (under the My devices or All Files section). If there are no folders yet, the Add folder button will be right in the center of the screen. If folders already exist, use the plus icon in the top toolbar.
After adding, the folder will appear in the All files -> Device Name section on all your connected devices.
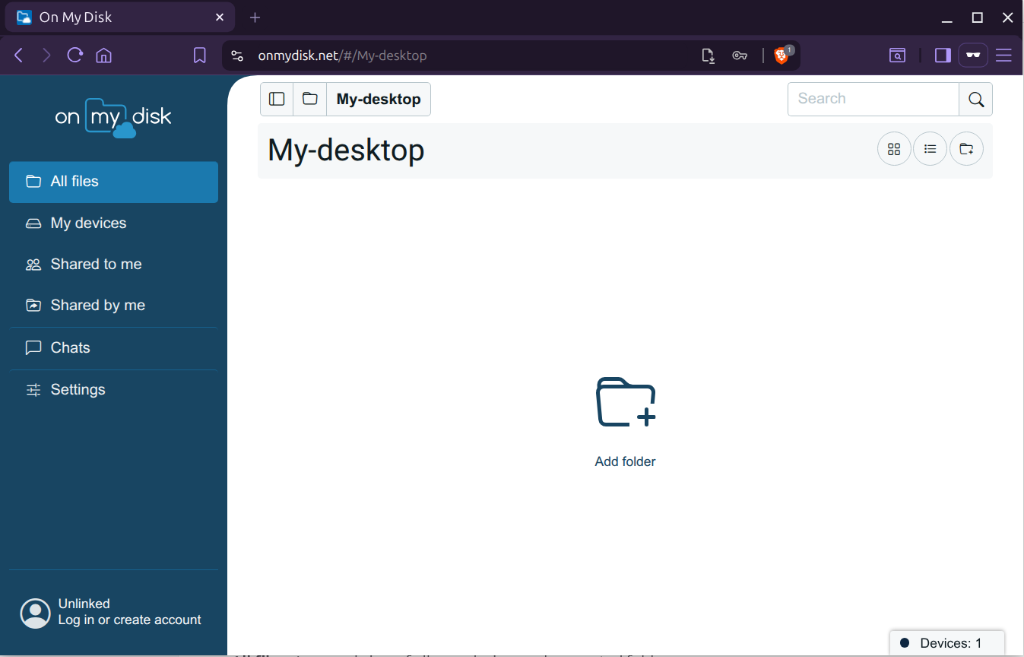
Click Add folder to choose any directory on your device. Once added, you will gain secure remote access to it, allowing you to browse, manage, and share your files from anywhere.
3. Working with Files (File Manager)
The file manager interface is intuitive and functional.
Main Sections (Sidebar):
- All files: A general view of all your devices and connected folders.
- My devices: A list of your physical devices.
- Shared to me / Shared by me: Access to shared resources.
- Chats: Access to the AI assistant.
File Operations:
- View: Click on a file to open it in the built-in viewer (supports PDF, images, video, text documents).
- Upload: Use the Upload button or simply drag and drop files into the browser window.
- Search: The search field in the top right corner helps you instantly find any document by name.
Context Menu
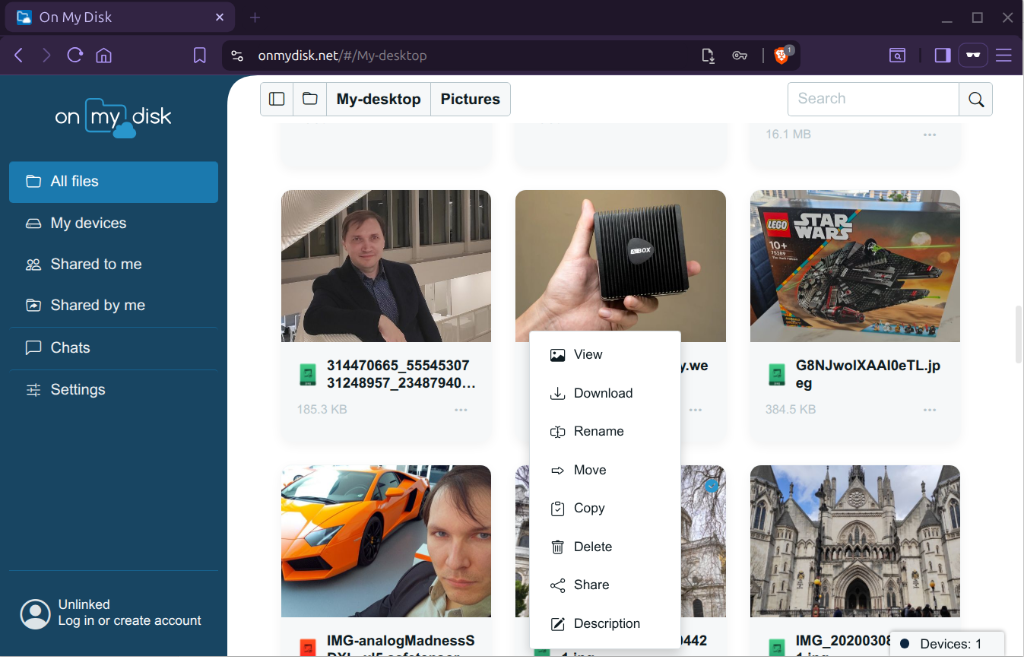
Right-click on a file or folder to open the quick actions menu:
- Open/View: Opens the file in the built-in viewer or editor.
- Download: Saves the file to your current device. For multiple files, a Download as ZIP action is available.
- Rename: Change the name of the file or folder.
- Copy/Move: Choose a destination path to duplicate or transfer data.
- Delete: Permanently remove the object from storage.
- Share: Create a public link or configure access permissions (see the section below).
- Sign: Ability to apply an electronic signature to PDF documents.
4. Creating Links and Sharing
On My Disk allows you to safely share files and folders with others.
Public Links
To create a link to a file or folder:
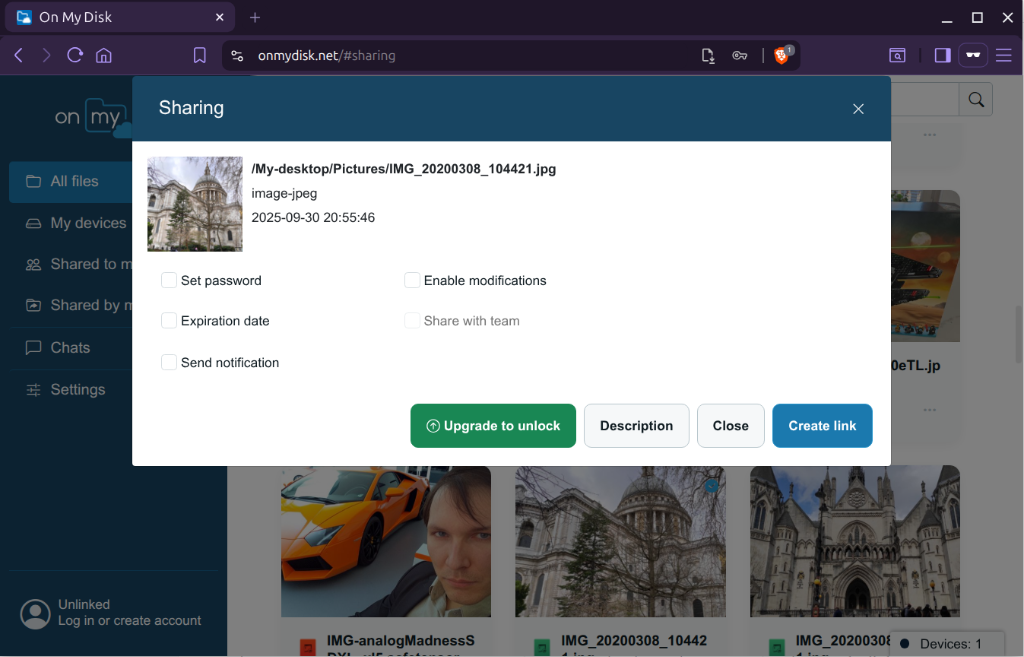
- Right-click on the object and select Share.
- In the window that appears, you can:
- Set a password: Only people with the password will be able to see the content.
- Expiration date: The link will automatically stop working after a selected time (15 minutes, an hour, a day, etc.).
- Allow changes: If enabled, other users will be able to upload files to your folder or edit documents.
- Click Create link, and then copy the resulting address.
Access Management
- All links you create can be found in the Shared by me section.
- There, you can change link settings at any time or completely revoke access using the Revoke link button.
- Active shared resources are also displayed in the Links subfolder within your device.