☁️ External Cloud Storage (rclone)
You can connect external cloud services (such as ProtonDrive, WebDAV, and many others) to your On My Disk node using the rclone WebDAV bridge.
Step 1: Install rclone
The only manual step is installing rclone on your device:
sudo -v ; curl https://rclone.org/install.sh | sudo bash
Everything else — remote configuration, password handling and running the WebDAV bridge — is done automatically from the On My Disk web interface.
Step 2: Add an external disk
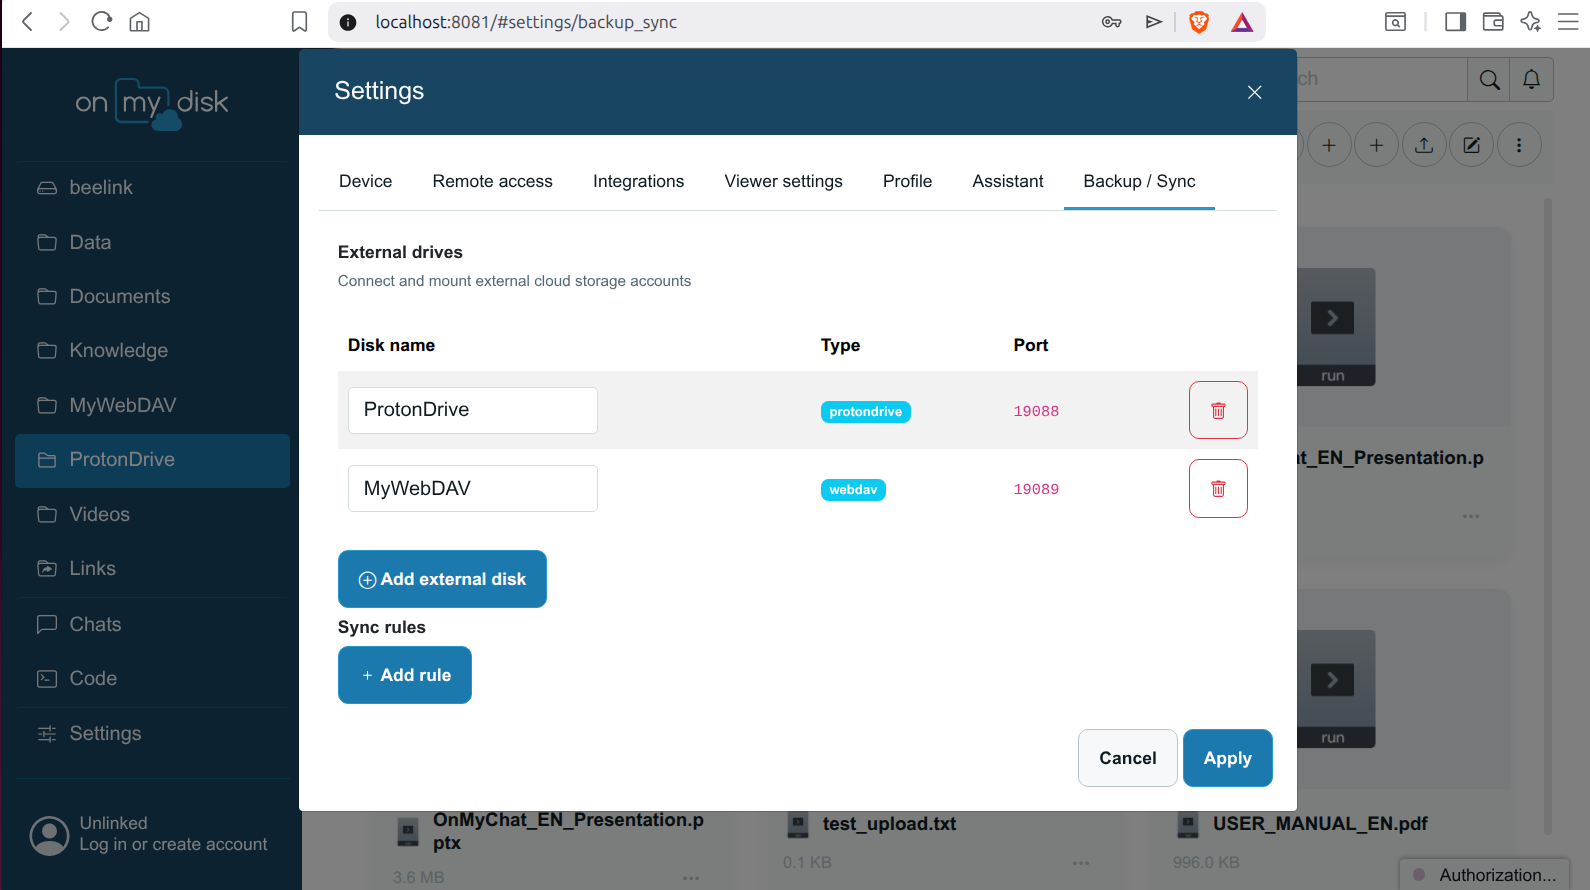
Open the Connector Web UI (http://<your-device-ip-or-name>) and navigate to Settings → Backup / Sync.
Click + Add external disk and fill in the dialog:
| Field | Description |
|---|---|
| Disk name | Any name you like, e.g. ProtonDrive, MyNAS |
| Type | ProtonDrive or WebDAV |
| URL (WebDAV only) | The WebDAV endpoint of your server, e.g. https://example.com/webdav |
| Username | Credentials for the external service |
| Password | Credentials for the external service |
| Port | Local port for the WebDAV bridge (the first free port starting from 19088 is suggested automatically) |
Click Save. Your disks appear in the list (name, type, port) with a Delete button to remove them.
Step 3: Automatic setup
On Apply, On My Disk automatically:
- generates or updates the corresponding section in
~/.config/rclone/rclone.conffor every configured disk (passwords are obfuscated withrclone obscure); - starts
rclone serve webdav <type>: --addr 127.0.0.1:<port> --vfs-cache-mode writesfor each share and keeps the process alive; - mounts each running share so it appears in the file manager sidebar under its name.
If you change or delete a share, the running rclone process is stopped automatically.
Migration: if you previously used the single built-in ProtonDrive share (port
19088), it is automatically migrated into the new disk list on the first start as the first share.
For configuring additional providers (OneDrive, Google Drive, etc.), please refer to the official rclone documentation.